

Secrets for garlic growing success: Make your garden into a royal palace for this queen of herbs
 GARDEN WORKS
by Emily Cates
Attention garlic lovers, now until the freeze is the time when you should be planting. If you have as much affection for this beloved stinking rose as I do, then you’ll want to read on for some helpful advice including cultivar selection, obtaining planting stock, site preparation, planting, and post-planting care.
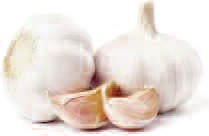 First, though, let’s find out which cultivars we like. Garlic is usually divided into groups having stiff stalks (hardnecks) or soft, pliable stalks (softnecks). Within these groups are several subgroups of many named cultivars.
Generally, hardnecks- especially those in the Rocambole group (Spanish Roja, Phillips, Stewart’s)- are valued for their exquisite flavors. Softnecks, on the other hand, (Kettle River Giant, Red Toch) tend to excel in storage and make beautiful braids. In a search to obtain suitable cultivars for our gardens and tastes, look for those with desirable qualities such as cold hardiness, storage abilities, and culinary attributes. In my opinion, the most tried-and-true, beginner-friendly hardnecks that are easiest to grow and obtain planting stock for are the ones called German Extra Hardy, and Music. I would also recommend a softneck, known as Inchelium Red.
Where can we find planting stock? FEDCO and Johnny’s are local companies that carry the aforementioned cultivars. Once you get a garlic patch established, save your own bulbs and keep your own strain going year after year. It’s always a good idea to make sure our planting stock is from the best of the best if possible, and free of disease and mechanical injury. Garlic that was harvested too late will have split bulb wrappers, but should be just fine for planting stock (and possibly more affordable).
Where should we plant our garlic? It’s optimal to give garlic the highest place of honor in the garden: a plot with the very best soil and full sun. Give them the royal treatment! At the end of every September, dig and grub out the weeds in the beds, paying extra attention to extracting as many roots and rhizomes as possible. (I’ve found this to be most effective when done by hand – just think of it as a free gym membership…and good business for your chiropractor…) Then go through with a spading fork and turn the soil, adding compost and/or manure, and amendments such as azomite and clean wood ashes. Now it’s ready to plant!
Next, separate the individual cloves from the bulb and plant each clove about 9 inches apart, pointy-side up with the point an inch or two under soil level. They can be in single rows or staggered in beds. Labels and a map are crucial if more than one named garlic is planted. After planting, cover the planting with a nice, thick mulch of straw. Farm animal bedding works really well, too, especially if it’s from goats. Speaking of animals – if there’s no fence around the garden, it might be a good idea to lay down some welded-wire fencing on top of the mulch. The garlic will grow through this while being protected from scratching, digging, and chomping critters who like garlic as much as we do.
In the meantime, we’re done for now until Springtime. Whew, it was invigorating work – and worth it, too!
Responsible journalism is hard work!
It is also expensive!
If you enjoy reading The Town Line and the good news we bring you each week, would you consider a donation to help us continue the work we’re doing?
The Town Line is a 501(c)(3) nonprofit private foundation, and all donations are tax deductible under the Internal Revenue Service code.
To help, please visit our online donation page or mail a check payable to The Town Line, PO Box 89, South China, ME 04358. Your contribution is appreciated!
Leave a Reply
Want to join the discussion?Feel free to contribute!