GARDEN WORKS: Wondering what to do now? You’re not alone!

GARDEN WORKS

Emily Catesby  Emily Cates

Help! I’m confused! Usually this time of year, I am planting trees and maybe peas. Normally, by now, maple sugaring has flown by, and I’m kicking myself for not pruning the entire orchard which has broken bud and is leafing out. And it’s usually on the late side for grafting and propagating. But wait! Hold it there! Is this really April as I type? Sure ­– it’s a glorious day, with the golden sunshine kissing everything outdoors with it’s luminous rays. The heady scent of thawing earth dances in my nostrils. But what is it with all the snow? A foot of it still blankets some parts of my yard and the ground is still frozen solid. Though in the warm spots there is mud, ice surely lurks beneath. The sap is still running in the maple trees without signs of budding yet. The bugs outdoors have awakened and buzzed around bewildered, seemingly not sure what to make of the snow. I must admit that neither do I!

“Son, this is a cold, gray day but spring is just around the corner….”

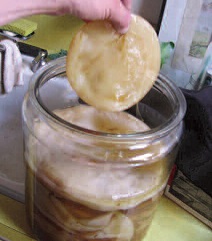
One thing that is a sure bet with our weather is unpredictability. We know that anyways, but sometimes it helps to be able to know the right time to do things. Otherwise, we can be paralyzed by uncertainty. This spring I am reminded of Ecclesiastes 11:4 where it says, “The one who watches the wind will not sow seed, and the one who looks at the clouds will not reap.” Really, if we keep waiting for the opportune time, we just won’t get it done. In situations like a never-ending winter, perhaps it’s best to follow nature’s lead: Is the sap still running? Well then, keep collecting it. Are those fruit trees, vines, and shrubs still dormant? Go ahead and prune them. And while you’re at it, why not take some cuttings to propagate? What? Is the ground still frozen? How about trimming up that blackberry patch and clearing out those pucker-brushes and such you told yourself you wanted to get rid of!

A real dilemma that could crop up might occur when an order arrives in your mailbox with a box of trees and other goodies from your favorite catalog. If the ground is frozen, where should they go? A savvy gardener knows there are options. If there’s enough thawed dirt somewhere to heel in the roots of these plants, they can be temporarily placed in this area until a preferred area is warmed enough to plant. Check the compost pile or a southern facing slope. No luck? A sawdust pile might do. Or, if these options are unavailable, take a bag of potting soil and put the plants into containers, covering the roots with the soil and watering well. Keep moist, but not waterlogged, and transplant when a spot is ready. Alternately, these plants can be kept in containers for a season or two if it is desirable to do so, especially if they need to grow bigger and get established. As long as they have enough supplemental watering and proper light, they should be OK. Oh, and be sure to keep tender plants and seedlings from freezing, even if you have to haul them indoors every night.

One benefit from a late snowpack is that many fruit trees will wait until later to flower, possibly escaping late spring frosts. Those of us who grow marginally-hardy peaches, plums, and apricots do appreciate it when these trees burst into bloom after frosts, thereby avoiding damage that could mean few or no fruits.

So look on the bright side! Yes, I’ve got spring fever too, but we all know – just as Frog’s father said to Frog in “The Corner,” in Arnold Lobel’s Frog and Toad All Year – “Son, this is a cold, gray day but spring is just around the corner….”

GARDEN WORKS: EXTEND SUCCESS! Starting long-season varieties now for best results (Conclusion)

Emily CatesGARDEN WORKS

by  Emily Cates

For part 1 of this series, click here.

The previous article in this 2-part series looked at practical suggestions on starting long-season plants in our climate. We looked at lighting setups, substrate (growing mediums), containers, watering, and climate control. This time, we’ll explore topics of viable seeds, what to plant, when to plant, and nutrition.

An essential element of germination is ensuring the use of seeds that are viable. Seeds that are fresh and stored in a cool, dry area will have a higher germination rate. If in doubt, pack a few into a damp paper towel, place into a zip lock bag, and store for several days in a warm place. Check daily for sprouts, keep moist, and observe. Sometimes it might be necessary to wait a week or two more, (be patient with certain varieties, it should say on the packet), but after that I?d give up and buy new seed for sure. Also, remember to bring frozen seeds to room temperature before opening, lest they condensate and spoil the seeds. And never leave packets of seeds in a greenhouse, please!

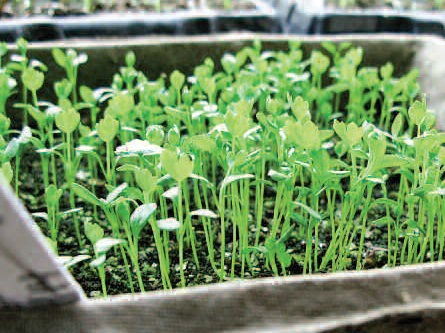
Now let’s look at is what to plant. Long-season seedlings that take a long time to get to a plant-able size from seed are happiest and most productive when started early. If these seeds were sown directly in our gardens here in Central Maine, they likely would not have time to reach their full potential. That’s why we start them early indoors. The cast of characters starring in your grow system could include leeks, onions, peppers, tomatoes, eggplant, artichoke, long-season herbs, and perennial flowers. Most likely it will state in the seed catalog or on the seed packet whether or not the seed needs to be started early. Since here in Maine we can get anywhere from 90 to 140 frost-free days, it is important to pay attention to the days needed until harvest that is listed with the seed. Timing is everything, which goes along with our next point:

We want to be sure when to plant. This involves finding out the recommended planting time frame, as mentioned above. Check a seed packet or gardening book for planting instructions and you might find that the time to start the seeds for your favorite plant is now! But not too early, unless you plan on transplanting into bigger and bigger pots later on as they grow- and using up more and more planting medium. Personally, I prefer to start smaller, later-planted seedlings near the later side of the recommended timeframe and let them catch up, as opposed to jumping the gun and ending up with oversized, pot-bound, sulking plants. I?ve even waited until a few weeks or so after the recommended planting timeframes and observed that the later plantings will oftentimes catch up with the earlier ones. I’ve noticed this to be especially so as the moon is increasing (when I try to start seeds), since it appears that a full moon has an affinity towards fertility and growth. That said, I have also experienced the disappointment of growing beautiful plants for a whole season only to have the frost get them just days before they would have ripened. There is oftentimes room for a little bit of error in case of late frosts in fall, though I wouldn’t count on it. The point? Starting seeds is a flexible endeavor and will accommodate a variety of schedules- but if we’re lazy we might miss out.

The final feature of a successful grow system that we’ll look at today involves nutrition. Since most seedlings do not require nutrients until the first set of true leaves has formed, don’t worry too much about it until then. Thereafter, feed an organic fertilizer specific to seedlings as directed about every week and a half or so. My favorite formulas are liquid fish-seaweed blends. The fish gives it a nitrogen boost, and the kelp provides trace minerals and hormones. I just add a little to my watering can when it’s time to fertilize, it’s quite convenient. Everyone seems to have their preferred brand or formula, so do a little research if you can to find out one that suits you best. As was mentioned in the previous article, the best locally-owned places to visit for nutrients and other growing supplies include LaVerdier’s General Store, along with FEDCO and Johnny’s.

Here’s hoping you seedlings are happy and healthy when the above needs are considered. But what should we do when things go wrong? It happens to the best of us! Let’s take a look at the subject of pests on seedlings at another time. Until then, enjoy gardening now in the comfort and convenience of a warm room.

GARDEN WORKS: EXTEND SUCCESS! Start long-season plants now for best results

GARDEN WORKS

Emily Catesby  Emily Cates

Part 1 of 2

Are you really, really looking forward to the promise of springtime? I am. The biting cold wind battering the frozen ground has given way to a warming breeze beckoning in aromas of thawing soil. As the heady scent of freshly defrosted mud entices my nostrils, I am hurled into an awakened state where I feel an urgent need to start seedlings. If you find yourself similarly inclined, why not read on? Since our area has a limited amount of frost-free days, plants that take a while – such as tomatoes, peppers, eggplant, leeks, onions, artichoke, and many more herbs, flowers, and the like – will have a greater chance of success if started indoors now. In this two-part article, let’s explore a few practical suggestions on starting long-season plants. This time we’ll look at lighting setups, substrate, suitable containers, watering, and climate-control.

First, the lighting setup. This could be as simple as a sunny, south-facing windowsill, a unit of grow-lights, or the luxury of a sun room or heated greenhouse. To prevent seedlings from becoming leggy once they’ve sprouted keep the containers as close to the lights as possible without burning the plants.

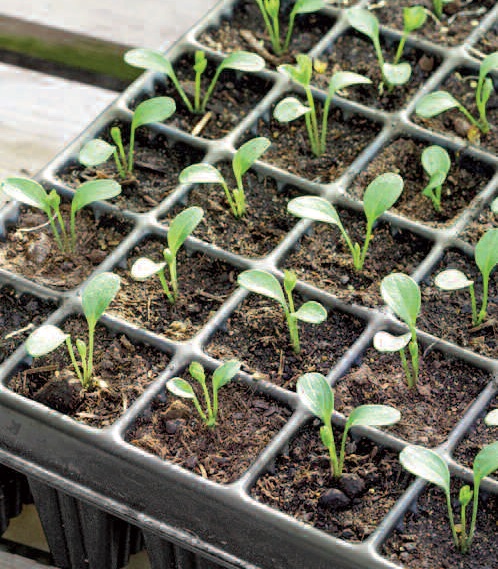
A second ingredient to successful seedlings is the substrate. Always remember to use organically-produced, fresh, pest and disease-free planting medium, whether purchased or homemade. Products that support germination are fine-textured and oftentimes do not contain soil. (These are especially helpful for starting small seeds.) Examples are peat, coir, vermiculite, etc. When purchasing bags of medium, look for those specifically formulated for germination. (Later on, when transplanting, we’ll use a coarser mix with organic matter to provide nutrition for the growing plants- but for now we’re just interested in germination.)

Another important component is a clean, well-drained container that holds the substrate. Possible candidates could include free and abundant used yogurt cups from home or the recycling center. Wash them well and poke holes in the bottoms, label them, fill with planting medium, and they’re good to go! Also, there is this handy dandy little tool called the “pot maker” which you can use to make countless amounts of pots out of plain newsprint. If expense is not an issue and the desire is aesthetic, go for the plastic flats and 6-packs and such found in seed catalogs and gardening centers. Seeds can be individually or collectively sown in smaller containers, but the resulting seedlings are easier to transplant if they are in flats or containers with a larger surface area. With this in mind, you might want to check out soil block makers, which form blocks of soil which can be placed next to each other in a tray and seeded. They are easy to work with, as the roots are “air pruned” as they grow long, making transplanting the seedlings a cinch.

Besides containers, we’ll also want to think about an acceptable source of water. Watering with plain tap water is fine as long as it’s not chlorinated or softened; use filtered water if there is any question. Keep the seeds and seedlings moist, but not waterlogged. If necessary, additional draining holes in the container can be poked through or drilled. Conversely, a clear cover of some sort can be placed over the container to conserve moisture – just check daily to make sure it can breathe.

Temperature is another factor of importance. 80 degrees F and above are necessary for proper germination, so a heat mat or other source of warmth could be used in a cold room. Elaborate climate-controls are highly effective, but potentially expensive. These are especially advantageous in a greenhouse or grow-light systems where the temperature has the tendency to fluctuate or get too hot. A simple oscillating fan is a useful, low-cost possibility. Get even fancier by hooking it up to a thermostat switch that flips it on when it gets above a certain temperature!

So, I hope this is enough info to get you started. I should mention that you can find as much of these indoor-gardening supplies as you’ll need at LaVerdiere’s General Store in China Village. Also, check out FEDCO and Johnny’s as well. Stay tuned for next time!

GARDEN WORKS: Kombucha: Hooch or healer?

Emily Catesby  Emily Cates

Conclusion: The Making of a “Miracle” Drink

Last time we took a look at the popular, yet controversial health tonic known as kombucha, and a few reasons why people drink it. This time, let’s explore a method behind the making of kombucha, highlighting needed containers, ingredients, and how to ensure a successful batch.

So, exactly how is kombucha made? And what’s that “mother” thingy all about? It’s the same idea as turning fruit juice into vinegar, the same organisms involved. (Ever heard of raw apple cider vinegar with “the mother”?) Instead of fruit juice or cider, however, the sugar source in kombucha is whatever is mixed in with the tea, such as plain sugar. The mother is a rubbery, pancake-shaped symbiotic colony of bacteria and yeast (SCOBY), that work together as they feed off the sugars and convert them into acids. You can oftentimes see a mother or pieces of one in a bottle of raw apple cider vinegar or store-bought unpasteurized kombucha. (I’ve used these to start a fresh batch with good results.) As each batch matures – in about two weeks – a new mother layer grows on top of the previous layer. These layers may now be separated to start new batches, or they will eventually pile up and take up all the space in the brewing vessel.

The “mother” in a batch of kombucha.

Speaking of the brewing vessel, be sure it’s non-metallic and not porcelain. Metals and lead can leach out into kombucha. A scrupulously clean, wide-mouthed glass jug with a non-metallic, loosely-fitted cover is a good idea. Start small at first, perhaps with a quart jar, to minimize the risks of losing a large batch if things don’t turn out as hoped for. Also, use organic ingredients such as black, green, oolong, chai, or other teas, organic sugars, and filtered water. Be aware, also, that there may be the possibility of a batch with an alcohol content of 5 percent. In theory there should be a minimal amount of alcohol, since the ingredients and mother are supposed to convert towards the vinegar side – though I have seen for myself that it doesn’t always happen that way in home brews. Keep your eyes out for mold, too, discarding the whole batch, and- if desired – starting fresh with a sterile vessel and a brand new mother. Alternately, if a mother is not available, a half cup or so of a previous batch, or store-bought raw kombucha may be added to the cooled mix before pouring into the vessel.

And, speaking of discarding a batch, be sure to get rid of any surplus mothers or raw kombucha appropriately. Never flush or dump down the drain, or you’ll grow a monster mother in your sewer – Ewww! Your compost pile will happily accommodate, as will your chickens or pigs.

So, now that you’ve heard the do’s and don’ts of making kombucha and wish to proceed, boil some water. Add your tea and sugar, then stir and cool to room temperature. Pour into the vessel and carefully place the mother on top. Cover and wait a couple weeks or so. When it is no longer sweet, it’s ready. Feel free to cut it with varying amounts of homemade juice and/or herbs and spices from the garden. The makings of a miracle drink? Maybe you’ll want to brew some up and then decide.