SMALL SPACE GARDENING: Plant now for a bountiful fall harvest
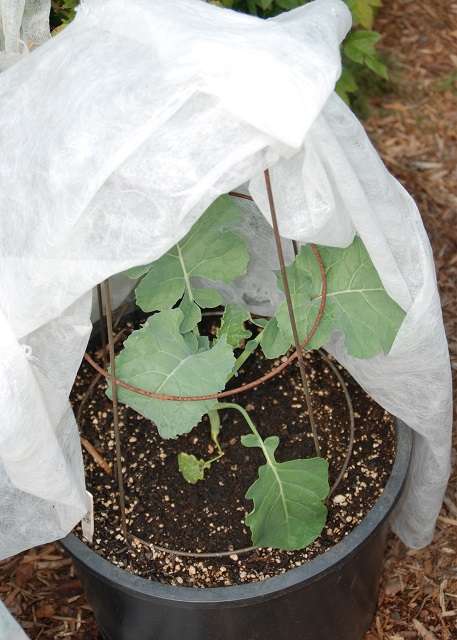
Floating row cover
 by Melinda Myers
Boost your fall garden harvest with some midsummer plantings. Fill vacant spaces left in the vegetable garden after harvesting lettuce, spinach, and other early maturing crops. Expand your edible plantings to other vacant spots in flowerbeds, mixed borders, and containers.
Sow seeds of beans, cucumbers, carrots, beets, and other vegetables that will have time to reach maturity before the end of your growing season. Simply count the number of days from planting to the average first fall frost in your area. You’ll find frost dates for your location on the internet, extension publications and other gardening resources. Next, check the back of the seed packet for the number of days needed from planting until harvest. As long as you have enough time for the seeds to sprout, grow and produce before the first frost, they can be added to the garden.
Some plants like collards, kale and broccoli tolerate, and even taste better, after a light freeze. This makes them great choices for a fall-harvested garden. Some garden centers sell transplants of these and other vegetables suitable for summer planting. Check the plant tags for the number of days needed for transplants to grow and start producing.
Extend the harvest season by providing frost protection in the fall. Cold frames and cloches that act like mini greenhouses for individual plants protect the plants from frost. Vent them on warm sunny days and close the lids when frost is in the forecast.
Use floating row cover fabrics for an even lower maintenance option. They are designed to let air, light, and water through to the plants while protecting them from frost. You will find row covers available in various weights that provide different levels of cold weather protection. Select the one best suited to your climate and the vegetables you are growing.
Loosely cover the plants with the fabric and anchor the edges with stones, boards, or landscape pins. Just lift the row cover to harvest, recover, and leave it in place until the harvest is complete, or the temperatures drop below what the row cover and plants can handle.
Wait for the soil to cool before planting lettuce, spinach, and other vegetable seeds that require cooler temperatures to germinate. Increase germination success by planting the seeds as directed, watering them in, and covering the row with a wooden lath to keep the soil cooler. Remove the lath as soon as the seeds sprout. Or start the plants indoors and move them into the garden as transplants. Then help keep the soil cool throughout the remainder of summer by mulching with leaves, evergreen needles, or other organic mulch.
Increase the health and productivity of your second planting by preparing the soil before planting seeds and transplants. Mix an inch of quality compost into the top six inches of soil or fertilize with organically rich low-nitrogen fertilizer.
Once your seeds and transplants are in the ground, be sure to water them properly. Keep the seedbed and roots of transplants moist for the first few weeks. Gradually reduce the watering frequency as seedlings sprout and grow, and transplants become established. Most plants need about an inch of water each week. Water thoroughly whenever the top few inches of soil are crumbly and slightly moist. Adjust your watering schedule based on your weekly rainfall, soil type, and air temperatures.
Harvest vegetables when they are at their peak of ripeness and early in the morning after the dew dries whenever possible. Regular picking avoids waste and results in a bigger harvest of flavorful and nutritious vegetables to enjoy throughout the fall.
Melinda Myers has written more than 20 gardening books, including the recently released Midwest Gardener’s Handbook, 2nd Edition, and Small Space Gardening. She hosts The Great Courses “How to Grow Anything” instant video and DVD series and the nationally syndicated Melinda’s Garden Moment TV & radio program. Myers is a columnist and contributing editor for Birds & Blooms magazine and her website is www.MelindaMyers.com.