GARDEN WORKS: A garden on your countertop

Countertop Sprouts

Emily Catesby Emily Cates

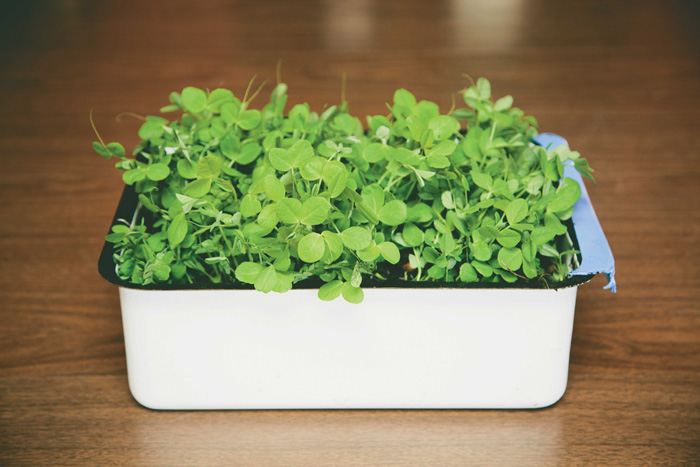
Growing fresh, delicious, nutritious sprouts for the winter table

Brrr! I don’t know about you, but the most I’m getting out of my garden right now is icicles. Wouldn’t it be nice to grow something fresh and green? Is it even possible when it’s so cold outside?

Enter sprouts, the superheroes of nutrition – here to save the day! Not only are freshly prepared sprouts delicious, but they are alive and loaded with vitamins, minerals, and enzymes that are very good for you. As an added bonus, they are inexpensive, easy to grow, and take up very little room in the kitchen. Kids are oftentimes fascinated at the sight of germinating seeds- which affords all of us an opportunity to enjoy a closer, more personal relationship with the food we eat. And even folks in urban areas and those with limited space can enjoy the benefits of fresh, delicious, nutritious sprouts.

If you’d like to give it a try, the first thing you might like to do is find a source of sprouting seeds. Clover, alfalfa, wheat berries, mung beans, fenugreek, onion, and chia are some popular choices. Whole grains like brown rice, wheat berries, whole barley, rye, quinoa, millet, and beans are easier to digest and even more nutritious when sprouted. (I always prepare them this way before cooking and thoroughly enjoy it!) A word of caution, though: Never sprout treated seeds and always make sure your seeds are food-grade. Some seeds such as those from tomatoes, potatoes, and other nightshade vegetables are poisonous when sprouted. And, of course, use common sense while growing sprouts. When in doubt to the freshness or safety of sprouts that have an off-odor or develop mold, throw them out and try again. Keep records when starting out to streamline the learning experience.

With that in mind, a great source for sprouting seed is local health food stores. Sometimes seed companies like Pinetree and Johnny’s sell sprouting seeds along with special sprouting equipment. (For a long term, sustainable source of sprouting seed stock, try starting your own crop outside in the spring.) For best results, use fresh seeds and store the unused portions in a cool, dry location in an airtight glass jar. The freezer is by far the best place for long-term storage of seeds. Just make sure to let the jar warm to room temperature before opening to prevent the formation of moisture on the seeds. That will keep any seeds from that batch from losing their viability if they are to be stored again.

Now that you have obtained the seeds, it’s time to start sprouting! Germination will occur sooner in a warm room. There are several different methods of growing sprouts, but I have found this way to be the easiest: Soak the seeds in water overnight. Use a strainer or colander for the sprouting vessel, and line it with screen or cheesecloth if the holes are large enough for seeds to fall out. Then place the seeds no more than 2 cm thick in the vessel and rinse several times each day. Keep them moist but not waterlogged. In a day or two, depending on the seed, you should see some action. The seeds can be eaten soon after they have sprouted or a while later when they have grown a couple inches or longer. Experiment on what suits your taste. Expose the sprouts to sunlight until they turn green with nutrition. Then enjoy some fresh garden goodness straight from your countertop!

GARDEN WORKS: Winter time hints to calm the chill

Emily Catesby Emily Cates

The cold winter winds dance along the frozen landscape, whispering their secrets to the trees swaying to the beat of a timeless song of the season. Shaking the snow from their limbs, they remind me of slow-motion pets stepping inside to dry off, throwing wet snowflakes in every direction. (Of course, I seem to always be within distance of getting snow-showered whenever this happens.)

As we venture into the coldest and darkest time of the year, little things that add warmth and comfort can add up to needed enjoyment. In this article, let’s look at a few things to brighten our winter days. If you have any suggestions, please feel free to send a message!

Working outdoors on a nice winter’s day is one of my favorite things to do – if done right. Of course, I always make sure to bundle up and wear my warm boots. If I’m outside for a while, or it’s really cold, then I’ll place some warmers in my boots and mittens. These foot and hand warmers, as well as medical hot packs that I’ve found to work comparably, are found in stores and online.

Though I consider warmers a tad spendy, they are necessary for hands and feet that have been overexposed to the cold in times past and consequently sensitized. Folks, don’t ever ignore cold hands and feet! You’ll regret it, I promise, like I have from the time I was a kid and went through swampy ice up to my knees and in my boots. Ever since then my feet get mad at me when they’re cold – especially when there are steel-toed or inadequate boots involved. In my not-so-humble opinion, it’s better to be warm and look silly, than to be fashionable and freezing!

Speaking of hands and feet, these parts of us may need extra attention this time of year. The wintertime environment both indoors and out has a tendency to promote dry, chapped skin. Lips, face, and hands are especially vulnerable parts that could need a little TLC.

Want to know some healing salve recipes I’ve found to be especially useful? Since I’m really bad at measuring when I make things, I’ll give you the concept: Start with a fat for a base. I mostly use Shea butter – but coconut oil, olive oil, beeswax, cocoa butter, mango butter, vitamin E, and jojoba oil are good, too. Lard and bear fat are traditional. These can be used singly or in combinations that work for you.

Safe, common herbs and such I have used that add soothing and healing properties include elder flowers, balsam fir, mallow, plantain, and calendula petals. Essential oils like rose, lavender, orange, clove, vanilla, or others can be added at the end of infusing to impart scent to the salve. (Follow directions on bottles since essential oils are really concentrated! Also, make sure to positively identify all ingredients. Test a small area of the skin with finished product salve to make sure it doesn’t cause irritation.)

Ratios of fat to dried plant material depend on availability and desired strength. I usually crumble dried plant material by hand or with a coffee grinder in amounts that “feel” right. (Consult a reputable source for specific ratios.) Combine the fat with herbs in a pot over low heat and gently stir once any solid fats have melted. Keep on low heat for several hours until sufficiently infused or until the desired strength is attained. (I leave my pots of salves on top of the wood stove on trivets overnight.) Strain the salve, add essential oils if using, and carefully pour into clean jars. Don’t forget to label what you’ve got and the date you made it.

Of course, a nice cup of hot tea and cuddly blankets should be on every winter list. To top it all off, how about a favorite seed catalog, a comfy chair, and a warm wood stove? Ah, now that’s good living!

GARDEN WORKS: Wrapping up for winter

Emily Catesby Emily Cates

Are we ready for Old Man Winter? We should be, since Mother Nature seems to be making up her mind that she’s here!

Many opportunities in the garden like digging and planting are lost when the ground freezes. The good news, though, is there may be a little time left for winterizing our garden and orchard now. The effort expended will reward us next year with fewer frustrations and heartaches, and much more satisfaction with our hard work. A case in point is all those wonderful fruit trees we invested our time and money in. At twenty-five bucks a pop, a tree will potentially pay for itself many times over — that is, if it thrives and survives long enough to make it worth our while. Chances are if a young tree successfully makes it through the winter, then it will be more likely to do well in the future. That’s why winter care is so vital and should not be overlooked, especially in beginning of the season and early on in a tree’s lifespan. The following are suggestions with trees in mind — though they should work well with vines (such as grapes), cane fruits, and shrubs.

The challenges for trees in the wintertime are unique. An important thing to keep in mind is that the snow can both help and hurt a tree. It helps in that it acts as a protective blanket that holds in warmth, thus enabling a tree to be fully hardy in northern areas. However, this blanket will also house unwelcome guests such as rodents who chew the bark and damage the tree. Foil the rascals with tin foil- simply make a collar and wrap the tree trunk at the base and up a foot or two. Or use hardware cloth, window screening, or a tree guard from a garden store. Remember to regularly check the collar and allow room for the growing trunk, keeping an eye out for girdling and abrasion if rigid materials are used.

Winter sun might brighten our day, but it can reflect on the snow pack and harm the trunk of a tree. Trees in the woods seem to have less of this problem since the light is more diffused, but it can be a bigger issue in an orchard planting. Sunscald can be remedied by a coat of interior latex paint mixed with joint compound and painted onto the trunk. (This, incidentally, also makes it easier to spot borer damage on pear and apple trees.) The FEDCO Trees catalog has a great recipe for an organic option using quick lime, milk, and linseed oil. Tin foil may once again come to the rescue for this problem; it’s also good for minimizing the danger of being smoosh­ed by the snow­ plow. I can’t tell you how many times I’ve heard of an unfortunate tree or shrub meeting its end this way — so let’s be sure to clearly mark our beloved trees and keep them safe!

A good layer of mulch around trees to their drip edge can be applied or renewed at this time. Mulching will help conserve moisture and nutrients, moderate soil temperatures, encourage earthworms, and keep weeds in check. Bark mulch, pebbles, old sawdust, shredded leaves, untreated cardboard, newspaper, rotted manure, and compost are preferable to hay, which encourages rodents. Be sure to pull the mulch a few inches away from the trunk. If possible, try to delay pruning until late winter, unless removing dead or diseased parts of the tree (unless you have a tree or shrub that has specific pruning needs for this time). Pruning encourages growth, which is not what we want right now. New growth is especially tender and susceptible to winterkill. So hold off on most pruning and fertilizers, and put the trees to bed instead.

And let’s face it. It is rare to have 100 percent success in the garden. So let’s take stock and walk our plot, and examine each and every tree, shrub, vine, or specimen. It may be a good idea to make the tough decisions now. Is there a tree that looks sickly, a vine out of place, or a shrub which under-whelmed our expectations? Maybe it’s time to take action and make room for something else that will be worth it. Late autumn is an ideal time for this, since the vacancy may be prepared now for planting with fresh ideas in springtime.

And while we’re outside, let’s enjoy the wonderfully crisp air, welcoming Old Man Winter to our gardens!

GARDEN WORKS – Ready for Wintertime! Tips and tricks as the clock ticks

Emily Catesby Emily Cates

Few times of the year are as satisfying to me as autumn. With crates full of goodies like garlic, onions, squash, carrots and potatoes- and canning jars brimming with the rewards of successful harvests, I feel surrounded with abundance, always thankful.

After planting the garlic and putting the garden to bed, the frost finally settles into the ground, bringing this season to an end. However, for the adventurous and practical minded gardener, there is still work to be done.

If you are especially motivated and would like to keep working, here are a few suggestions. Let’s look at moving perennials, shrubs, vines, and trees – and also tips for making the garden plot easy to work with come springtime.

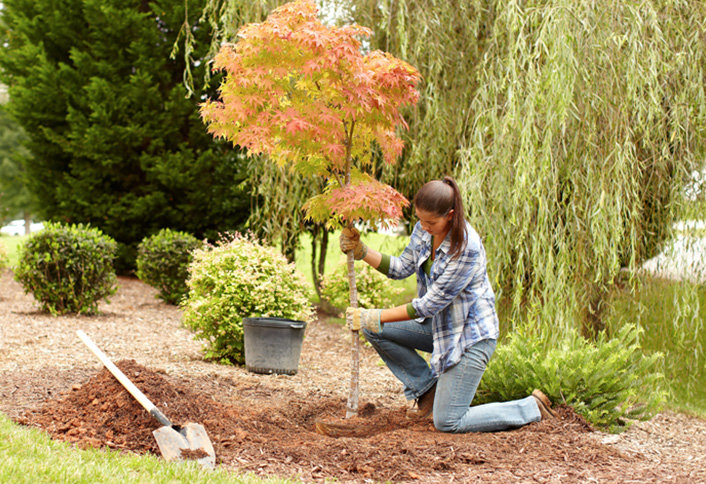
There’s a good window of opportunity to take advantage of between the times where plants have gone dormant and when the ground freezes for good this year. Usually this happens for a few weeks in our area starting late October/early November. So, if you have a tree you’d like planted, a perennial divided, a shrub moved, a grapevine pruned, then get to it!

Unlike springtime plantings of trees – for example – which must be well-watered throughout their first season, fall plantings only need thorough waterings up until the freeze. A nice thick mulch extended to the drip line but pulled away several inches away from the trunk is beneficial. (My trees seem to enjoy being mulched with aged debris left over from processing firewood, and they look pretty, too.)

Speaking of mulch, here’s a little time saving trick to working the garden next spring: mulch the heck out of it! (Wondering what to use for mulch? Think cardboard covered with old hay, leaves, straw, or compost. Tarps, old blankets, rugs, garden fabric, and sheets of plastic can do the job too.) Then, in the springtime, the mulch is moved and the garden planted with ease.

What I like to do is clean the garden beds thoroughly from crop residues and weeds – making sure to get any roots and rhizomes – and till it up with a spading fork, adding soil amendments as desired. Then I pile on the mulch, imagining it to be a warm, fluffy comforter for the garden to snuggle. Depending on my mood, I might even sing it a lullaby.

At this point, depending on how badly I overworked in the growing season, I will either take a needed hiatus, or (foolishly) press on to other outdoor activities such as firewood. Most likely it’s the latter scenario, with all the work from the growing season being the prelude, conditioning and leading up to the hard work of the harvest of the woods.

For all the time and effort, though, it sure feels good to have food and a warm home — along with a free “gym membership.”

GARDEN WORKS: Get it done in the garden while it’s still nice outside

Emily Catesby Emily Cates

Here comes autumn! It’s all around us — from the crisp, aromatic smells of wood smoke to the sight of falling leaves in the chilly air. There’s no denying that the cold is on its way. But isn’t this a most pleasant time of year to be outside? Aside from yellow jackets inebriated from the fallen apples, there is not a buzzing bug in sight to be concerned with. (But watch out for ticks!) And the chill in the air is refreshing when working vigorously outside. Let’s use this opportunity to get things done in the garden.

One of the most important tasks at hand is garden clean-up. Removing the remnants of plants such as frosted tomatoes, squash, and others will help reduce the incidence of pests and diseases in the garden. It’s also a good idea to do a thorough weeding: grubbing out all those pesky quack grass rhizomes and deep-rooted weeds such as burdock and dandelion. One helpful trick that makes getting rid of weeds easier is to till or hand-dig the area, let it rest for a few days or so until the new crop of weeds germinates, and then dig again. Got chickens? Corral them in this area and they will be happy to scratch it up for you. And they’ll add their own “contributions”. Another hint that helps with the weeds is to generously mulch the garden patch with shredded leaves, un-colored newspaper, straw, rotted hay, old sawdust, cardboard, bark mulch, or anything that does not contain weed seeds. Some folks even lay down old rugs and boards so that next spring when they’re pulled up, no weeds- and a soil that’s easy to work with. Oh, and let’s not forget to add nutrition at this time. If you have access to hay bedding from a goat pen, it will serve dual duty of being a decent mulch, with fertilizer “pellets” included. Garlic loves this!

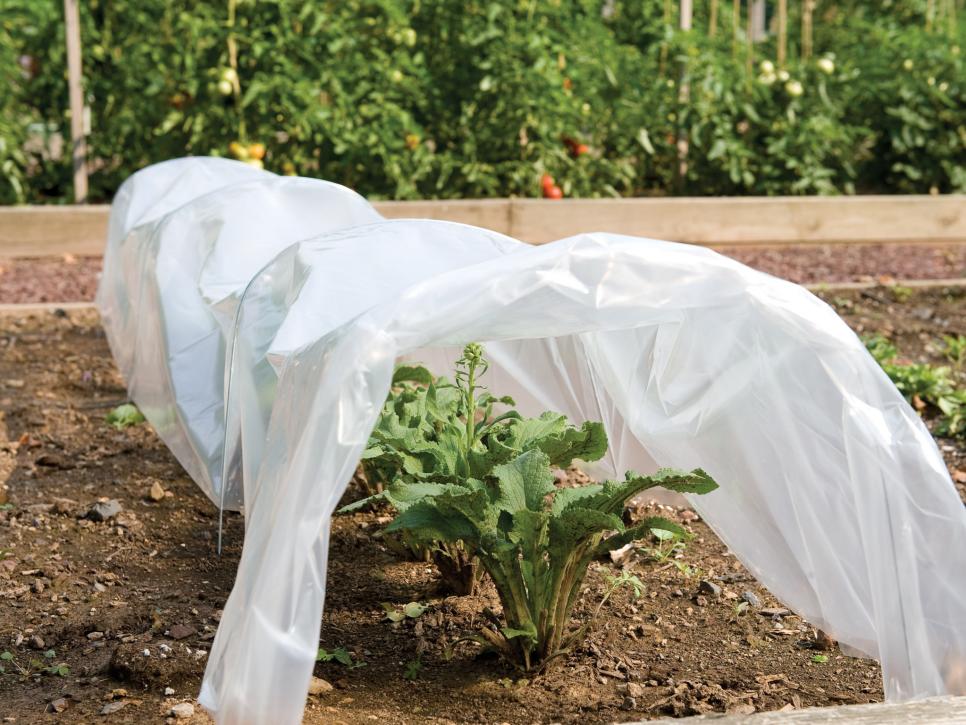
Just because there was a frost doesn’t mean it’s over in the garden. Actually, it’s the prime time to plant garlic and cold-weather vegetables such as kale, and parsnips. With row covers, cold frames, hot beds, and hoop houses, the possibilities include greens, beets, radishes, kohlrabi, Brussels sprouts, cabbage, turnips, leeks, and carrots. Some veggies, such as carrots, Brussels sprouts, and parsnips, are much sweeter when harvested after a freeze- even in the snow! Give it a try if you get a chance.

Would you like to save some seeds of the harvest right now? Here are a few helpful tips to get started: Small amounts of seeds adequate for an average household can be harvested by hand. Try to save the healthiest, most productive, true-to type seeds from the “cream of the crop”. Unless you want a surprise, always save seeds from open-pollinated (non-hybrid) varieties that were not crossed with other varieties.

Generally, most seeds are ready to be saved after the mother plant has reached full maturity. Cucurbit family members (cucumbers, melons, squash, etc.) will be quite overripe and at the inedible stage. Fertile seeds of this type, when freshly harvested, will sink to the bottom of a cup of water. Save these ones and discard the floaters. Tomato seeds appreciate being fermented for a couple of days to dissipate a germination inhibitor- simply squeeze the tomato pulp into a cup, and wait until a layer of mold appears on the surface of the pulp.

This may take a day or two- but don’t wait too long or the seeds will sprout. When the gel capsules surrounding the seeds have broken down, pour fresh water into the cup. The good seeds will sink to the bottom of the cup, and the bad seeds and gunk will float. Pour off the impurities, repeat until clear, and rinse the seeds through a strainer.

Dry the cleaned seeds on a labeled paper plate, and voilà! Seeds from pod-bearing plants will be ready when the pod is completely dry. Try saving these types of seeds when the weather is arid, or pull the whole plant and hang under cover in a barn, outbuilding, or attic until the plant has dried. Seeds such as from beans, peas, corn, and squash are ready to store when they cannot be dented when applied pressure from a fingernail. These seeds and others can be stored dry in glass jars in the freezer for long term storage. (Just make sure to warm the jar at room temperature before opening so as to prevent condensation.) Bulbs, tubers, and rhizomes are the seed, such as with garlic, potatoes, and hops, respectively; oftentimes they keep best for planting when they have been thoroughly cured and stored away from light in a dry, cool (but not freezing) area. Really, a good rule of thumb for all seeds is to keep them dry and away from heat and light.

Hope you enjoy being productive in the garden!

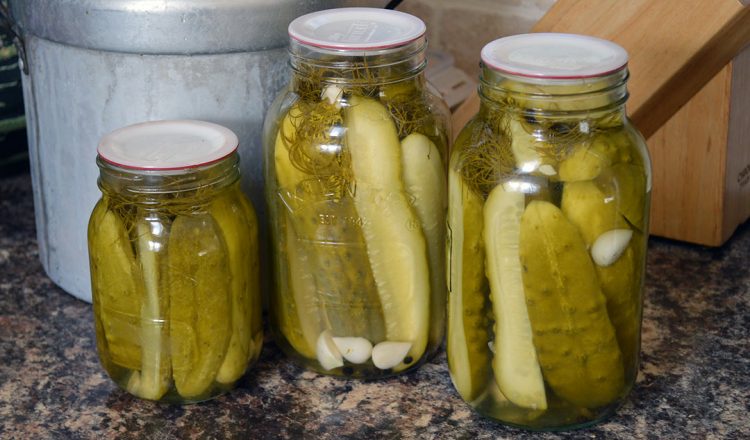
GARDEN WORKS: Pickles anyone? Nothing beats old-fashioned pickles

Mmmm… Homemade pickles!

Emily Catesby Emily Cates

Pickles are a fabulous way of capturing the essence of the late-summer harvest and preserving it for culinary enjoyment well after the season is over. In times past, pickled vegetables were an important staple for many cultures. Without the use of modern canning equipment, pickling was done the old fashioned way by lacto-fermentation. Even today, the art and traditions of preparing these delicious foods this way has continued in many ethnic groups and in families who prefer this method.

Most folks today are only familiar with pickles that are canned with vinegar and sugar. Unless we have Old-World grandparents who kept a crock full of fermenting vegetables in the cellar, the concept of lacto-fermentation may be foreign to us. What exactly is lacto-fermentation? In its simplest form, it is a process of utilizing the culture of lactobacilli to create an acidic environment in which the food ferments and is preserved. Bacteria which cause spoilage are unable to proliferate in the lactic acid and in the presence of acid-loving bacteria.

A similar process is used to make other foods that are familiar to us, such as yogurt, vinegar, and sourdough bread. Pickling cucumbers, sauerkraut cabbage, and dilly beans are well-known pickling vegetables, but did you know almost every vegetable can be pickled? And did you know that in some places like Scandinavia and the Arctic Circle, foods we might not associate with or recommend being pickled, like meat and fish, are fermented? If you would like to read in depth about lacto-fermentation and try some incredible recipes, the books I have found most helpful are Wild Fermentation by Sandor Ellix Katz, and Nourishing Traditions by Sally Fallon. There are occasionally lacto-fermenting workshops at MOFGA to help learn the art hands-on. Dive in and get cultured!

So why bother going through the trouble of making old fashioned pickles? One taste is all you need to be convinced. Of course, if you are pregnant and are having a pickle-craving phase, these really hit the spot. And in addition to their excelling culinary qualities, lacto-fermented vegetables are loaded with beneficial microorganisms and nutrients unlocked by the fermentation process. These pickles may help with digestion and provide valuable enzymes missing in modern diets. Like a mad scientist, the pickle-maker experiences the awe and wonder of seeing vegetables, water, and salt being transformed into a bubbling elixir of life. Partaking of these deliciously transformed vegetables releases feelings of joy and satisfaction of having perpetuated a rare and ancient art of food preservation. Still weary of trying this at home? Here are some hints: Next time you are at the natural food store pick up a jar of “Real Pickles” and see if you like them. Reserve the liquid to pour into the crock if you start a batch of homemade pickles. This gives the microorganisms a jump-start and helps to ensure a better chance of pickling success. A handful of grape leaves will keep the pickles nice and crunchy, whether you make them the modern or old fashioned way. And don’t forget to add fresh garden herbs to make an especially memorable batch.

The equipment to make pickles is surprisingly simple. The fermentation vessel can be a crock, a clean food-grade plastic pail, glass canning jars, or anything similar. There is no need for expensive equipment, though brand-new crocks can be obtained from outfits such as Lehman’s at a premium price. My vessel of choice for pickling is the removable crock from a slow-cooker. They are oftentimes in abundance when the cooker part no longer works and the whole unit is discarded. Then the crock part is the best part! Look for these at lawn sales, thrift shops, and even the swap shed at the dump. Friends and family are always eager to get rid of spare and no longer useful crock pots, and I am happy to oblige. Antique crocks that your grandparents used are not advisable, since they may contain lead. So, to be safe, stick with newer vessels. And make sure all equipment is clean and veggies are sound, fresh, washed, and scrubbed.

There are different versions of lacto-fermenting vegetables, some perhaps better than the ones I have experience with, though the following basic method has been successful for me. Don’t be afraid to experiment with what works for you with materials you have on hand. Fresh vegetables are placed whole or in pieces into a crock, mixed with a ratio of 3 tablespoons for every 5 lb veggies with non-iodized sea or pickling salt, and covered with pure, un-chlorinated water and cheesecloth. The cheesecloth and veggies are weighted under the water with a heavy dish or some kind of weight, and covered tightly around the top rim of the crock with another cheesecloth or lid to keep out dust and insects. If you use a lid, make sure it’s not airtight so that the fermentation gasses have room to escape. The crock is placed at room temperature during the initial, most active phase of fermentation, and then moved to a cool but not freezing place for long-term storage. Try tasting the pickles after three days if the room temperature was above 75-80 degrees, a while longer if it was cooler. Successful pickles will be zesty and have a bite to them. To save crock space, I remove pickles from the crock that taste nice and tangy and which are fermented. I place them into clean, wide-mouthed quart canning jars, cover them with brine, and store them in the fridge, checking the batches occasionally. A well-preserved batch can last for months and sometimes years.

Nature does most of the work, but it is important to check on the crock daily while fermentation is vigorous. Sometimes a batch will really get going and overflow the crock, so be prepared just in case this happens. If a film forms on the top, simply skim it off by lifting the cheesecloth from out of the brine. Rinse the cheesecloth thoroughly, and then return to the crock. If the batch goes bad, you will know. Oh my, will you ever, and your neighbors, too! Compare your batch to the lacto-fermented pickles from the natural food store if you are unsure of the success of a batch. Surface mold will not affect what is under the brine, but a batch that went bad is unmistakably foul. As long as the ph of the crock’s contents is acidic, harmful and spoiling bacteria are not supposed to grow. If ever in doubt, send a questionable batch to the compost. It makes sense to pickle in small batches so if you get a bad one, only a part of the hard-earned harvest will be discarded. Keeping records will help to determine what is behind success or failure.

Making old-fashioned pickles, along with winemaking and cheese-making, is truly an art. If the first time is less than successful, don’t give up! When you succeed and master this art, you and your family will enjoy a delicious and healthful delicacy that one can really take pride in making.

GARDEN WORKS: Not for the birds! Protect your berries from aerial assaults

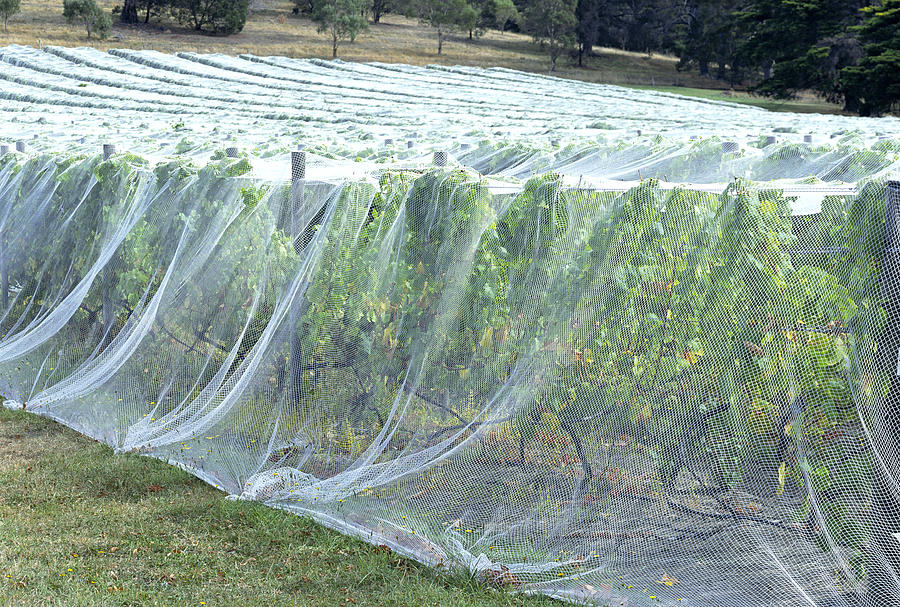
An example of bird netting.

Emily Catesby Emily Cates

“Swoop! Dive! Flap!” go their wings as they raid my beloved berry patch, their beaks voraciously plucking choice berries with no regard to how many backbreaking hours I’ve spent growing them. As I attempt to harvest the leftovers and shoo them away, the birds whiz by and release their droppings in what seems like a sinister game to deter me from “their” buffet. I can’t help but feel under attack!

Does this sound familiar to you? Most berry growers at some point have experienced competition from our flying feathered friends. This article was written for those of us who need tips on how to protect berries
from hungry birds, or at least to keep their damage to a minimum. The tricks up our sleeves include visual and auditory deterrents, netting, and other ideas that will hopefully help a hardworking gardener keep her sanity.

I’ll start with the least expensive option— visual deterrents. Materials that reflect sunlight and move around in a breeze may create an illusion of fire and frighten a bird away. Aluminum pie pans strategically hung around the garden work accordingly. “Flash tape”, a long strip of coated metallic material, has been quite effective in my garden – even for cedar waxwings. It is unrolled and strung slightly twisted from one side of the garden to the other in several parallel rows, or dangled from branches. FEDCO and Johnny’s carries it (and most of the products mentioned in this article), though a thicker, more effective version is found online.

“Scare balloons,” faux owls, and other predator facsimiles may or may not work as well as the real thing, and should be moved around often for maximum effect.

Now – thunderous drum roll, please! There is a product on the market that uses explosions to deter birds. No kidding! If you (and your neighborhood) like loud noises and bright flashes, it might be perfect for you. This thing-that-goes-boom attaches to a propane tank and intermittently blasts off at random, unpredictable intervals, terrifying every living creature in its vicinity. Let me know how it works for you.

Since birds such as cedar waxwings are bold and descend upon the berry patch in groups of several birds, they are especially difficult to control. And, no, you can’t just wait there for them with a .22, since songbirds are protected species. As annoying as it sounds, you actually have to place a barrier between the berries and the birds. Behold the bird netting! If you have just a few plants, it shouldn’t be a great big deal. More than a few, however, and it could become expensive. Just remember, though, that this might be the most effective method.

Another way to keep birds out of the berry patch includes planting native trees and shrubs that they prefer away from the garden. The idea is that they will be attracted to these instead of the garden, though I wonder if this will actually summon all the birds in the neighborhood to your spot. Serviceberries, as delicious as they are, can be especially problematic – as the cedar waxwings will decimate them before they’re even ripe and then move on to the berry patch. However, I’ve found that mulberry trees produce so many mulberries that there are usually enough to share.

Whatever deterrents are employed, it’s important to remember to use them before the berries begin to ripen. Once birds are established in the garden, they are harder to get rid of. If you need advice, the folks at the Maine Department of Inland Fisheries and Wildlife are a good place to call.

However, we enjoy our berries, may they NOT be for the birds!

GARDEN WORKS: Ode to a woodchuck

Emily Catesby Emily Cates

I’ve got me a whistle pig, what should I do? Make him my friend, or put him in a stew? Groundhog. Woodchuck. Gopher. Whistle Pig. Who can deny the feelings of angst a gardener feels upon hearing these names or spotting one anywhere near the garden? Marmota monax – as it is properly known – is a common, mostly herbivorous large, brownish-gray rodent that burrows underground and has a reputation for devouring beloved garden plants (I like to use the name woodchuck derived from the Algonquian wuchak.)

Since woodchuck babies are sent out of the nest around early July to strike out on their own, encounters at this time are likely. This notorious character needs not a lengthy description: You’ll oftentimes see one standing in a field erect like a prairie dog, slinking across the tree line, or running when chased away. M. monax can even swim and climb trees if necessary. Potentially dangers when cornered, a woodchuck’s teeth and claws are not particularly pleasant to tangle with. Also, their burrows are claimed to be destructive to farm equipment, livestock and foundations. Also, they can become infected with and transmit rabies. However, I am compelled to come to their defense! Several years ago I wrote a column about this critter, and I must confess that since then I have gained more experience and a change of attitude towards them. While I have accepted the possibility of individual woodchucks in certain situations can develop bad habits and appetites for our gardens, I am not convinced that all of them deserve to be on our most wanted list. This article was written for and dedicated to the understanding of these creatures. If you’re curious as to why I would even think about defending the reputation of a woodchuck, then read on to find out.

First of all, please allow me to explain how I developed sentimental feelings toward woodchucks. (Insert derisive laughter, snickers and sneers.) I should tell you that I currently have two woodchucks near my garden area. One lives out back of my home in a retaining wall (Phil) and the other (Phyllis) at a tree line near a mowed area that borders part of the garden.

Phil – the one out back – is easy to watch through my windows. The birds let me know when he’s out and about, and it’s fun to spy on him as he gorges himself on Queen Anne’s Lace. Afterwards, he plops himself down on the retaining wall and sprawls about in the shade. I have yet to see him venture into the garden.

Phyllis oftentimes comes out of her hiding places and watches me as I weed the garden. While she seems to enjoy mostly clovers and grasses in the mowed area, I will occasionally catch her nibbling lamb’s quarters and pigweed in the garden. She hasn’t yet decimated anything of value, though I have seen one bite taken from squash leaves, and a dozen or so stalks of winter rye were found shredded. My tomatoes have begun fruiting, but she leaves them, the melons, garlic, onions, carrots, cabbages, potatoes, peppers and the fruiting shrubs and trees alone. Surprisingly, she hasn’t touched the peas. What will she do when my beans are in flower? I often wonder if it would be different if my garden was perfectly weeded – if she, for lack of choice, would be eating garden goodies instead? My hunch is that a lot of problems with woodchucks are the result of a lack of sufficient wild foods for them to consume, and then they develop a taste for garden goodies. Does the lawn need to be flawlessly mowed and the garden perfectly weeded? I should also mention that woodchucks will occasionally dine on slugs, snails, grasshoppers, and other small pests. This is only around one percent of their diet, but seeing how they need to eat one-third their body weight in vegetation every day – this could become significant.

Another factor to look at is the sonic critter chaser I installed a couple of weeks ago in the back corner of the garden. This year the deer have made an appearance despite my efforts with fencing. The critter chaser emits a flashing light and an annoying noise in the range of hearing of animals such as deer. I think it works, so far so good. (I wonder if deer damage is mistaken for woodchuck destruction?) Since my device has a setting for small animals as well, I could set it to repel woodchucks if I saw damage directly attributed to them.

Because the woodchucks at my place are used to my presence and I am aware of their habits and nesting areas, it would be fairly easy for me to construct plans to get rid of them if needed. While doing research, I happened upon some options that might interest you if you have problems with woodchucks.

The hint I most wanted to share involves dumping used kitty litter and mixing it into the soil around the entrances to woodchuck burrows. (If someone did that to my home, I’d want to move out, too!) The only problem with this method is the possibility that the critter will move on and become someone else’s problem – unless, of course, there is plenty of habitat and an abundance of predators to keep things in check. Foxes, coyotes, raccoons and hawks all prey on woodchucks. Dogs are especially good at keeping them away, but there is the danger of a beloved pet being injured or contracting rabies from woodchucks. Another option involves enhanced fencing. In an area where there is plenty of forage for woodchucks, a regular welded wire fence or something similar over three feet tall might be sufficient; however, if the varmints are determined, the fence can be buried a foot into the ground, turned out in an L-shape. Also, two strands of electric fence – one four inches near the ground, the other six to eight inches above the ground are effective not only for woodchucks, but for raccoons and deer as well.

I will admit that I am still on the fence regarding whether woodchucks are friends or foes for a garden. And perhaps as we get closer to autumn their appetites will pick up and I will regret defending them. But, for now Phil and Phyllis are fascinating to watch. If they’re not bothering anything, then why not preserve them and enjoy their antics?

GARDEN WORKS: It’s planting time! Helpful hints to get your garden growing

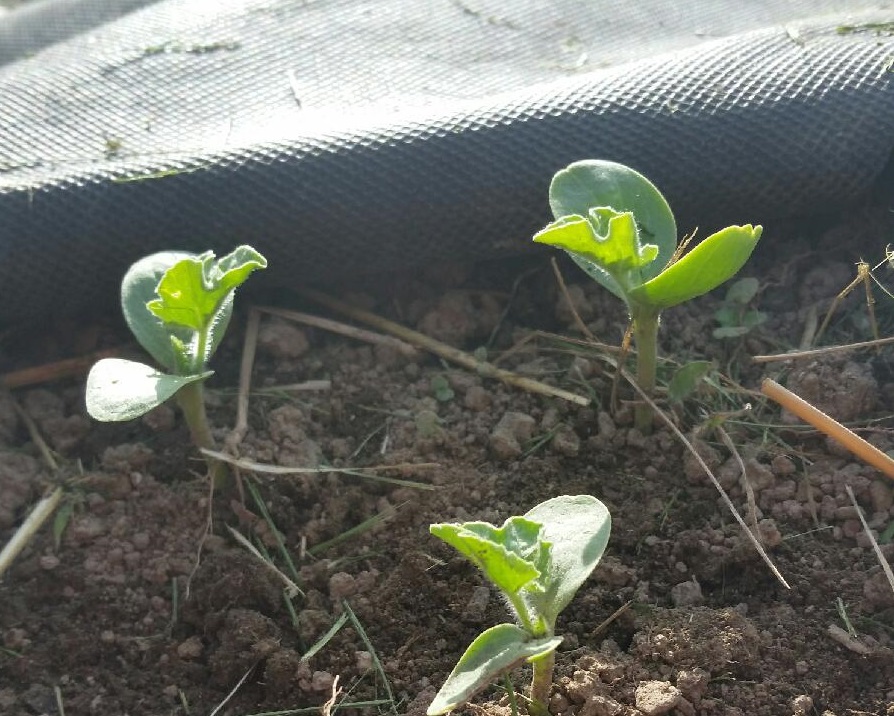
photo by Emily Cates

Emily Catesby Emily Cates

Finally, after what seems like forever, the soil in the garden is ready to plant what we’ve all been waiting for: tasty tomatoes, sumptuous squashes, wonderful melons, among many more. After a tough winter and tardy spring, we’re going to make up for lost time. To get things growing, we have a few tricks up our sleeve. This time we’ll look at planting strategies and growth promoters.

This year’s planting season is definitely behind schedule by a couple weeks or so. But don’t despair, it should all catch up just fine with the right care. Early plantings, unless covered somehow with a hoop house or cold frame, won’t grow much faster than if they were planted when the soil warms up. So no worries for slacking this time.

However, I would certainly recommend planting long season, commonly direct-seeded veggies like corn, squash, beans, melons, pumpkins, and gourds right away. We definitely want them to have enough time to mature before our first frost in the fall. Tomato, pepper, eggplant, and others that are planted as seedlings will also appreciate being set out ASAP.

Cool-weather crops that are direct-seeded like peas and spinach have probably missed the boat as far as spring sowing goes, but will be happy to get a second chance to be planted in about a month for a fall harvest. Lettuce and salad greens like to chill in the shady part of the garden when summertime sizzles.

Black plastic mulch speeds up the growth of heat-loving plants and keeps weeds at bay. Also, floating row covers provide an added layer of warmth and protect plants from pests, providing the cover is removed when needed during pollination.

Most important is a nice, rich, healthy soil with adequate nutrients for the plants to grow fast enough to catch up. Liquid fish and seaweed fertilizers can be applied as directed. Compost and aged manure are great mixed into the garden or top-dressed as needed. I’ve read a ratio of 1:10 organic matter to soil, but heck, that seems minimal to me and I just load it on with fine results. Squash especially grows like crazy when planted in a manure pile, and that’s just what I want. Now if the weeds weren’t as enthused.

GARDEN WORKS: Wake up sleepy head, maple sugar time is here

Emily Catesby Emily Cates

Wake up, wake up! No more excuses for hibernation or procrastination, Springtime is here. Yes, I know I know – it’s still cold and there’s plenty of snow, each flake erasing an equal amount of motivation to be outside in the garden.

But let’s look at the possibilities anyways, since eventually the window of early-springtime activities will close whether we complete them or not. Why not enjoy a taste of spring by making maple syrup? Let’s whet our appetites by taking a look at this delicious task.

Ah, maple syrup – the amber nectar of our beloved maple tree, made from the sparkling, crystal-clear sap that is a delightful Spring tonic on its own. At 40-45 degrees in the daytime and freezing at night, this luminous sap flows from tree wounds and can be collected.

Maple sugaring supplies are super easy to find at hardware stores or online, and YouTube has an amazing amount of helpful how-to videos.

It is extremely important to use clean, food-grade materials for anything that comes in contact with the sap and syrup. Avoiding trees in polluted areas might be a good idea as well. Also, never overload a tree with too many taps. The best advice I can think of is to use recycled materials if possible, be safe, and to have fun!

To collect the sap, I gather containers such as traditional metal sap pails, water jugs, or buckets. Then, with a 5/16th drill bit, I drill a hole slightly upwards about 2-2-½ inches, preferably on the south-facing side of the tree. Depending on the setup, I’ll either hang the pails on the tree by the hooks provided on spiles that are gently hammered in the hole, or I run food-grade tubing to a container set on the ground.

Once there’s enough collected, it’s time to strain it and boil it down. Since I only have a small amount of taps and my wood stove is already running this time of year, I usually evaporate the sap in big pots on the stovetop.

40:1 is a common ratio for sap to syrup, which is quite a lot of work for a small amount of product. Oftentimes, depending on how full my hands are this time of year (and how much of it gets raided by my family or myself!), I’ll make the decision to cook with the sap instead of making syrup. I always try to reserve some to slow-cook a chicken…Delicious!

Large quantities of sap are traditionally steamed off in a sugar house with an evaporator suited for many gallons. (I know folks who make a fire in a barrel on its side with foodservice basins fitted on the top.) The sap boils in the basins and is carefully watched, especially as it thickens. Ladle off any foam and impurities from time to time, adding a drop of cream if it threatens to foam over.

Now it’s down to the nitty-gritty! Tell the kids and pets to wait at a safe distance, and put on a pair of steady hands, because this is hot stuff. When the syrup reaches seven degrees above boiling, or 219 degrees F, it’s ready to carefully strain and pour off into containers. I prefer mason jars, which are handy for canning the syrup. If desired, process in a hot water canner for 10 minutes.

Enjoy maple syrup in as many ways as your imagination allows. How sweet it is to start spring on such a delicious note!